Forms - Standard User
Table of Contents
- Forms - The Basics
- About the Forms Page
- Create New Form
- Fill Out and Finalize Form
- View Finalized Form
- Print Finalized Form
- Delete Form
Forms - The Basics
eLogic Genesis' Electronic Form feature is accessible in client records via the → Forms tab. Electronic Forms must first be created by Agency Admins to become available.
Data points that are shared between the client intake pages and a form will be auto-populated on the form upon creation. For example, if a form contains the fields "First Name" and "Last Name", the client's first and last name will automatically be filled out in the form as it appears on the client's intake page.
Navigators have the option to set a follow-up date for any form before it is finalized. The follow-up reminder will be sent to all navigators assigned to the client record.
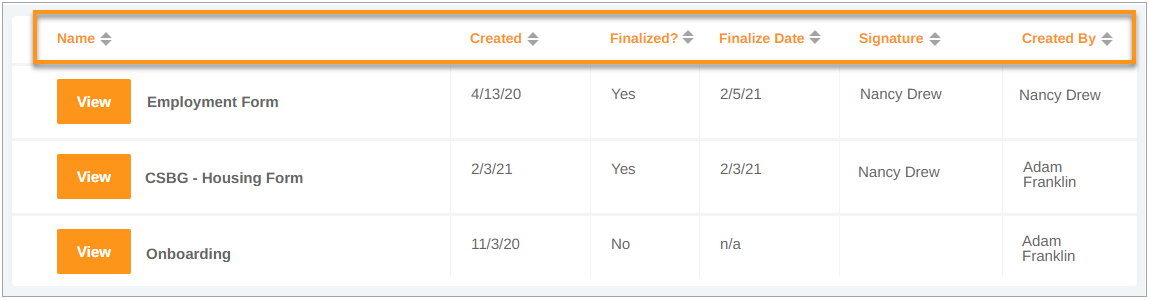
Forms Page
The Forms page contains a filter bar and a table that displays all created, started, and finalized forms in the client record.
Filter Bar
Across the top of the Forms main screen, you'll see a blue ![]() filter bar which contains different filters categories. Each category will expand and show different filter options when clicked. When each filter is selected or removed, the table below will display only forms that match the filter options selected.
filter bar which contains different filters categories. Each category will expand and show different filter options when clicked. When each filter is selected or removed, the table below will display only forms that match the filter options selected.

It may seem that some filter drop-downs display fewer options than they should. These are “smart” filters and are designed to display only options that are relevant to the forms displayed in the table.
Once a filter option is selected, it can be removed by clicking the check box in the drop-down, clicking Clear all in the drop-down, or by clicking the grey rectangle shown under Selected Filters beneath the filter bar.
Filter Options
- Name - filter forms by name
- Created On - filter forms that were created during a date range
- Finalized? - filter forms that have or have not been finalized
- Finalize Date - filter forms that were finalized during a date range
- Signature - filter forms by who signed them
- Created By - filter forms that were started by specific users
Form Table and Column Headers
Easily sort forms in client records by clicking the arrows next to each column header. The arrows will sort the table in ascending/descending order according to the data in the column.
Create New Form
- Open client record
- Select the Forms tab
- Click Add Form in the top right corner
- Click the drop-down under Form Name
- Select the form and click Create Form
- Form will open
- Click ← All forms in the top left corner to return to the Forms table
Fill Out and Finalize Form
- Open client record
- Select the Forms tab
- If the form has already been started:
- Locate the form in the table below
- Click View to view or pick up where you left off and skip to step 8 below
- If the form has not been started, click Add Form in the top right corner
- Click the drop-down under Form Name
- Select the form and click Create Form
- Form will open
- Fill in all relevant fields - any fields that appear in the client intake pages and have information entered will be automatically filled in
- Once completed, type the name of the individual signing the form in the Signature field at bottom of the screen and enter the Date Completed
- Click Finalize
- Scroll to the top and click ← All forms in the top left corner to return
- The form will be stored and accessible via the table on the Forms page
View Finalized Forms
- Open client record
- Select the Forms tab
- Locate the form in the table below - remember, you can filter or sort the table to quickly locate files
- Click View to open finalized form
Print/Save Finalized Form
- Open client record
- Select the Forms tab
- Locate the finalized form in the table below - remember, you can filter or sort the table to quickly locate files
- Click View to open finalized form
- Click
 Print Form in the top right corner
 - Follow your computer's prompts to print or save
Delete Form
- Open client record
- Select the Forms tab
- Locate and hover your mouse over the form you wish to delete
- Click the
 delete icon
- After the delete icon turns into a
 redo icon, that is your verification that the form has been deleted and will disappear once you leave the page
 - If you wish to undo the delete, click the redo button
- After the delete icon turns into a
Comments
0 comments
Please sign in to leave a comment.