Program Waitlist Management
Topics covered in this article:
- Waitlists - The Basics
- Roles and Permissions
- Program Waitlists
- Manually Place Clients on Waitlist
- Rearrange Clients on Waitlist
- Search Waitlist
- Accept Clients From Waitlist (enrolls client in program)
- Remove Clients From Waitlist
Waitlists - The Basics
Waitlists help organize new/returning clients and existing clients who wish to enroll in any of your organization's programs. Navigators with the appropriate role permissions can place clients on, accept clients off, and remove clients from your organization's various waitlists.
eLogic Genesis offers three different types of waitlists:
- Global Invitation Waitlist - specific to the Client Portal
- Agency Enrollment Program Waitlist - specific to the Client Portal
- Program Enrollment Waitlist - can be created for any/all of your organization's programs
The Global Invitation Waitlist relates specifically to the Client Portal for organizations who have created and distributed their Global Invitation Link to individuals within their communities. Managing the Global Invitation Waitlist includes the same steps as managing any other program waitlist, but requires a different role permission (more of which will be covered later in this article). See Step 1. Global Invitation Link to learn more about Global Invitation Waitlists.
The Agency Enrollment Program Waitlist also relates specifically to the Client Portal and is used as a screening tool for new clients or clients who need to re-enroll to maintain their status within your organization. Managing the Agency Enrollment Program Waitlist includes the same steps as managing any other program waitlist. See Step 2. Agency Enrollment Program, Application, and Waitlist and Client Portal - Managing the Global Invitation Waitlist to learn more about this particular waitlist.
Any program can have its own Program Enrollment Waitlist. Program Enrollment Waitlists can be used in conjunction with, or separate from, the Client Portal. Creating a waitlist for any or all of your organization's programs can help organize and coordinate client enrollment.
Roles and Permissions
In order to manage waitlists—regardless of which type—the navigator must have the appropriate role permissions enabled. Agency Admins will need to identify which roles will have access to which waitlists and adjust each roles' permissions accordingly.
Agency Admins may need to create additional roles if they do not want to provide blanket Global Invitation, Agency Enrollment Program, or other Program waitlist access to all navigators assigned a single role.
In the case where an Agency Admin will need to create new roles for selected navigators to interact with program waitlists, click here for a step-by-step guide.
Global Invitation Waitlist Role Permission
The role permission that provides navigators access to manage the Global Invitation Waitlist is called the Client Global Invitation Management. Be sure this role permission is enabled for the individuals you wish to manage your organization's Global Invitation Waitlist.
Agency Enrollment and Program Waitlists Role Permissions
The role permission that provides navigators access to manage your program waitlist(s) is called the Client Program Application Management. Be sure this role permission is enabled for the individuals you wish to manage your organization's Agency Enrollment and/or other Program waitlists.
Program Waitlists
Programs that have "Use Waitlist" feature enabled will be shown under Waitlists from the system navigation bar.
In the sample agency below, we can see that there are eight total waitlists: seven Program waitlists and the Global Invitation Waitlist.
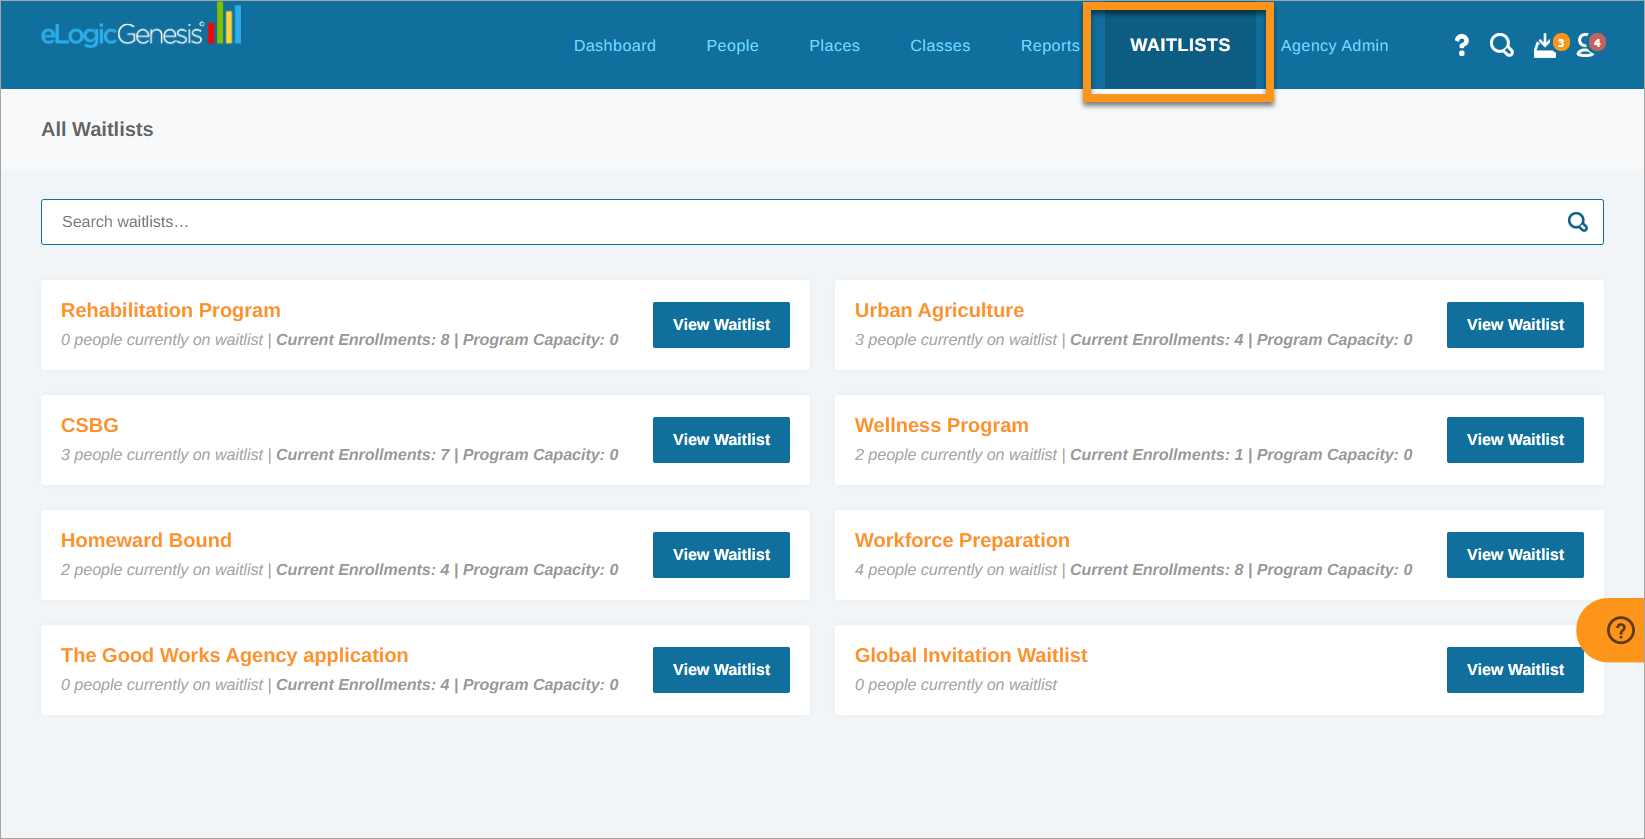
Under each program, we can also see how many people are currently on the waitlist, how many Current Enrollments there are in the program, and the set Program Capacity (established by agency admins):

When ready to manage a waitlist, locate it from the Waitlist home page and click View Waitlist.
Manually Place Clients on Waitlist
- Click Waitlists from the system navigation bar
- Locate the desired waitlist
- Click View Waitlist to open
- In the text field on the right, ("Begin typing to search for people...") enter the client's name
- The system will search and display matching client names in a drop-down list
- Locate and click the client from the drop-down list
- Client is added to waitlist
- Click Save Waitlist when finished
Rearrange Clients on Waitlist
- Click Waitlists from the system navigation bar
- Locate the desired waitlist
- Click View Waitlist to open
- Locate the client you wish to rearrange
- Click and drag the client's information box vertically to adjust their position on the waitlist
- Repeat as necessary
- Click Save Waitlist when finished
Search Waitlist
- Click Waitlists from the system navigation bar
- Locate the desired waitlist
- Click View Waitlist to open
- In the text field on the left, ("Search waitlist...") begin typing the client's name
- Clients below will filter to display only matching clients
Accept Clients From Waitlist (enrolls client in program)
- Click Waitlists from the system navigation bar
- Locate the desired waitlist
- Click View Waitlist to open
- Locate the client(s) you wish to accept from the waitlist - accepting clients from the waitlist will automatically enroll them in the selected program
- Select the check box(es) to the left of the client name
- When finished and if desired, Assign client(s) to navigator (optional) by clicking the drop-down list and selecting the navigator to whom you wish to assign the client
- Click Accept clients
- Clients will be automatically enrolled in the program and have the selected navigator assigned to their record (if one was selected)
- Repeat as necessary for different navigator assignments
Remove Clients From Waitlist
- Click Waitlists from the system navigation bar
- Locate the desired waitlist
- Click View Waitlist to open
- Locate the client(s) you wish to remove from the waitlist
- Click the delete icon on the far right of the client information box - If you remove a client by accident, leave the page then confirm that you wish to discard the changes by clicking OK in the browser prompt; do NOT save
- Client is removed
- Repeat as necessary
- Click Save Waitlist when finished
Comments
0 comments
Please sign in to leave a comment.